2016-01-03, 12:10
The following is a little snippet to export an Emacs org mode file to HTML and to upload it to the server via FTP. Remark: It’s better to use scp for the upload!
G:\Programme\emacs-24.3\bin\emacs.exe --batch -l "C:\Users\Uwe\.emacs" --visit "nameoftheorgfile.org" --funcall org-html-export-to-html

@echo off
echo user Myusername> ftpcmd.dat
echo MyPassword>> ftpcmd.dat
echo bin>> ftpcmd.dat
echo put nameoftheorgfile.html>> ftpcmd.dat
echo quit>> ftpcmd.dat
ftp -n -s:ftpcmd.dat servername
del ftpcmd.dat
Uwe Ziegenhagen likes LaTeX and Python, sometimes even combined.
Do you like my content and would like to thank me for it? Consider making a small donation to my local fablab, the Dingfabrik Köln. Details on how to donate can be found here Spenden für die Dingfabrik.
More Posts - Website
2015-12-25, 12:32
Bislang habe ich Subversion immer auf einem externen Virtual-Root Server (1und1) betrieben, da ich aber auch ein Synology NAS habe, kann ich dies auch zuhause erledigen.
Zur Datensicherung der Repositories nutze ich ein Shellskript, das die jeweils aktuellste Version eines Repos in eine Datei dumpt, die dann über Amazon S3 in der Cloud gesichert wird.
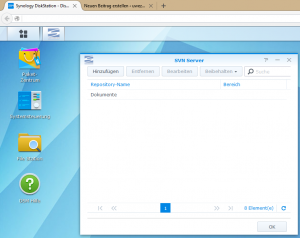
Der SVN-Server wurde über den App-Store des NAS heruntergeladen und installiert
Im Aufgabenplaner wird das Dump-Skript nachts aufgerufen
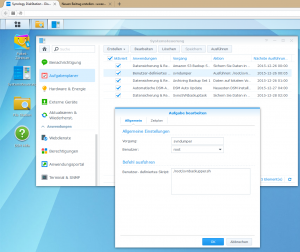
Das Skript dumpt jeweils die HEAD-Version in die entsprechende Datei
NAS> more svnbackupper.sh
#!/bin/ash
for i in $( ls /volume2/svn/); do
 svnadmin dump /volume2/svn/$i -rHEAD > /volume1/backups/synosvnbackups/$i.dump
 done
Uwe Ziegenhagen likes LaTeX and Python, sometimes even combined.
Do you like my content and would like to thank me for it? Consider making a small donation to my local fablab, the Dingfabrik Köln. Details on how to donate can be found here Spenden für die Dingfabrik.
More Posts - Website
2015-12-25, 12:09
In der letzten Zeit hatte ich öfter das Problem, dass Emacs meine org-mode Datei mit dem falschen Encoding öffnet und alle Umlaute kaputt sind. Die Lösung findet sich auf Superuser:
M-x revert-buffer-with-coding-system

M-x set-buffer-file-coding-system
Ergänzung: Ich habe meine .emacs Datei wie folgt erweitert:
;; UTF-8 as default encoding
(set-language-environment "UTF-8")
Uwe Ziegenhagen likes LaTeX and Python, sometimes even combined.
Do you like my content and would like to thank me for it? Consider making a small donation to my local fablab, the Dingfabrik Köln. Details on how to donate can be found here Spenden für die Dingfabrik.
More Posts - Website
2015-12-19, 14:29
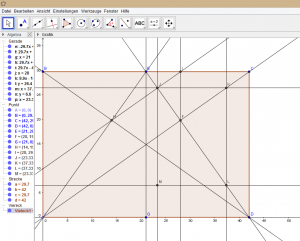
Hier ein Beispiel, wie man mit Geogebra Satzspiegel entwerfen kann.
Satzspiegel
Uwe Ziegenhagen likes LaTeX and Python, sometimes even combined.
Do you like my content and would like to thank me for it? Consider making a small donation to my local fablab, the Dingfabrik Köln. Details on how to donate can be found here Spenden für die Dingfabrik.
More Posts - Website
Schlagwörter:
Geogebra Category:
Allgemein,
LaTeX |
Kommentare deaktiviert für Satzspiegel konstruieren mit Geogebra
2015-11-22, 03:38
A couple days ago I would have been happy to have an automated way of creating Powerpoint slides (Powerpoint was not my choice anyway) now I found one with the help of the Scripting Guy and StackOverflow. The following code just opens Powerpoint and adds a couple slides, each with a different layout. I am not sure (resp. too lazy to check) how many layouts there are but it must be more than 30.
Clear-Host
Add-type -AssemblyName office
$application = New-Object -ComObject powerpoint.application
$application.visible = [Microsoft.Office.Core.MsoTriState]::msoTrue
$presentation = $application.Presentations.add()

$slide = $Presentation.Slides.Add($presentation.Slides.Count + 1, 1) # title slide
$slide = $Presentation.Slides.Add($presentation.Slides.Count + 1, 2) # slide title and text
$slide = $Presentation.Slides.Add($presentation.Slides.Count + 1, 3)
$slide = $Presentation.Slides.Add($presentation.Slides.Count + 1, 4)
$slide = $Presentation.Slides.Add($presentation.Slides.Count + 1, 5)
$slide = $Presentation.Slides.Add($presentation.Slides.Count + 1, 6)
$slide = $Presentation.Slides.Add($presentation.Slides.Count + 1, 7)
$slide = $Presentation.Slides.Add($presentation.Slides.Count + 1, 8)
$slide = $Presentation.Slides.Add($presentation.Slides.Count + 1, 9)
$slide = $Presentation.Slides.Add($presentation.Slides.Count + 1, 10)
$slide = $Presentation.Slides.Add($presentation.Slides.Count + 1, 11) # just slide title
$slide.Shapes.title.TextFrame.TextRange.Text = "This is the slide title"
$slide = $Presentation.Slides.Add($presentation.Slides.Count + 1, 12) # blank |
Clear-Host
Add-type -AssemblyName office
$application = New-Object -ComObject powerpoint.application
$application.visible = [Microsoft.Office.Core.MsoTriState]::msoTrue
$presentation = $application.Presentations.add()
$slide = $Presentation.Slides.Add($presentation.Slides.Count + 1, 1) # title slide
$slide = $Presentation.Slides.Add($presentation.Slides.Count + 1, 2) # slide title and text
$slide = $Presentation.Slides.Add($presentation.Slides.Count + 1, 3)
$slide = $Presentation.Slides.Add($presentation.Slides.Count + 1, 4)
$slide = $Presentation.Slides.Add($presentation.Slides.Count + 1, 5)
$slide = $Presentation.Slides.Add($presentation.Slides.Count + 1, 6)
$slide = $Presentation.Slides.Add($presentation.Slides.Count + 1, 7)
$slide = $Presentation.Slides.Add($presentation.Slides.Count + 1, 8)
$slide = $Presentation.Slides.Add($presentation.Slides.Count + 1, 9)
$slide = $Presentation.Slides.Add($presentation.Slides.Count + 1, 10)
$slide = $Presentation.Slides.Add($presentation.Slides.Count + 1, 11) # just slide title
$slide.Shapes.title.TextFrame.TextRange.Text = "This is the slide title"
$slide = $Presentation.Slides.Add($presentation.Slides.Count + 1, 12) # blank
Uwe Ziegenhagen likes LaTeX and Python, sometimes even combined.
Do you like my content and would like to thank me for it? Consider making a small donation to my local fablab, the Dingfabrik Köln. Details on how to donate can be found here Spenden für die Dingfabrik.
More Posts - Website
2015-11-21, 22:57
A PDF with the most important Excel shortcuts: http://www.thecompanyrocks.com/wp-content/uploads/2011/02/CR-Updated-Chart-of-Popular-Excel-Keyboard-Shortcuts.pdf
Uwe Ziegenhagen likes LaTeX and Python, sometimes even combined.
Do you like my content and would like to thank me for it? Consider making a small donation to my local fablab, the Dingfabrik Köln. Details on how to donate can be found here Spenden für die Dingfabrik.
More Posts - Website
2015-11-21, 20:05
The easiest approach to find empty folders with Powershell could be:
(gci C:\Scripts -r | ? {$_.PSIsContainer -eq $True}) | ? {$_.GetFiles().Count -eq 0} | select FullName
however this just finds the folders which have no files in them. To find truly empty folders – the one which also have no subfolders – use the following:
(gci C:\Scripts -r | ? {$_.PSIsContainer -eq $True}) | ?{$_.GetFileSystemInfos().Count -eq 0} | select FullName
Source: http://superuser.com/questions/321231/how-to-find-empty-directories-in-windows-using-a-powershell-script
Uwe Ziegenhagen likes LaTeX and Python, sometimes even combined.
Do you like my content and would like to thank me for it? Consider making a small donation to my local fablab, the Dingfabrik Köln. Details on how to donate can be found here Spenden für die Dingfabrik.
More Posts - Website
Schlagwörter:
Powershell Category:
Powershell |
Kommentare deaktiviert für Finding truly empty folders with Powershell
2015-10-31, 20:42
Es war mal wieder Zeit, meine auf KOMA-Scripts SCRLTTR2 Klasse basierende Briefvorlage zu aktualisieren. Die Vorgaben war:
- Nutzung mit pdfLaTeX und XeLaTeX
- wenn xeLaTeX genutzt wird: Nutzung eines OpenType Fonts (hier
Source Sans Pro)
- Einbetten des LaTeX Codes in die PDF-Datei (via
navigator)
- Das Datum soll aus den einzelnen Komponenten des Dateinamens gezogen werden (via
getvarsfromjobname)
- Die PDF Meta-sollen direkt aus den gesetzten Variablen befüllt werden (z.B. um sie später mit
pdfinfo auszuwerten)
- Optional: Einbetten eines QRCode, der wichtige Informationen optisch auslesbar macht. Ob und wie ich das mal auswerte, weiß ich aber noch nicht. (via
qrcode Paket)
Um den Code in den einzelnen Briefen noch ein wenig sauber zu gestalten, werde ich später alle Definitionen in eine separate LCO Datei übernehmen.
Update vom 15.11.2015 Das navigator Paket läuft auch mit xelatex, wenn man es vor dem Laden der Polyglossia-Sprache lädt. IBAN und BIC stehen jetzt in der Fußzeile. Den qrcode habe ich mangels Anwendung erst einmal deaktiviert. Mittels lastpage wird angezeigt, wieviele Seiten der Brief hat.
%!TEX TS-program = XeLaTeX
% 2015-10-31
\documentclass[DIN,parskip=half,fontsize=11pt,fromalign=right,fromrule=afteraddress,ngerman,enlargefirstpage=true]{scrlttr2}

\usepackage{varsfromjobname}
\usepackage{qrcode}
\usepackage{blindtext}
\usepackage{eso-pic}
\usepackage{lastpage}

\usepackage{ifxetex}
\ifxetex
   \usepackage{fontspec}%
   \usepackage{polyglossia}%
   \usepackage{navigator}
   \setmainlanguage[spelling=new]{german}%
	\setmainfont[ItalicFont={Source Sans Pro Italic},BoldFont={Source Sans Pro Bold},BoldItalicFont={Source Sans Pro Bold Italic}]{Source Sans Pro}%
\else
   \usepackage{babel}
   \usepackage{navigator}
\fi

\embeddedfile[TeX code]{\jobname}{\jobname.tex}

\renewcommand{\familydefault}{\sfdefault}

\firsthead{
\textsc{Dr.~\usekomavar{fromname} \hfill \thepage/\pageref{LastPage}}
\vspace*{1em}
\hrule
}

\setkomafont{pageheadfoot}{}

\newkomavar{fromplace}
\newkomavar{keywords}
\newkomavar{IBAN}
\newkomavar{BIC}

\setkomavar{IBAN}[IBAN]{DE12\,3456\,0123\,1234\,1234\,99}
\setkomavar{BIC}[BIC]{ABCDEFGHEI}


\setkomavar{yourref}{xyz-203052}
\setkomavar{yourmail}{\today}
\setkomavar{myref}[Mein Zeichen]{1929424487}
\setkomavar{fromname}{Max Mustermann}
\setkomavar{fromplace}{Hamburg}
\setkomavar{fromemail}{mustermann@gmail.com}
\setkomavar{frommobilephone}[Mobil:]{+49 (0) 123\,456\,7890}
\setkomavar{fromaddress}{Musterweg 19, 12345 Hamburg}
\setkomavar{subject}{Betreff}
\setkomavar{keywords}{Finanzamt}


\usepackage{hyperref}
\hypersetup{colorlinks,linkcolor={black},pdftitle={\usekomavar{subject}},pdfauthor={\usekomavar{fromname}}, %
    pdfsubject={\usekomavar{subject}},pdfkeywords={\usekomavar{keywords}}
}

\date{\usekomavar{fromplace}, \getfourfromjobname.\getthreefromjobname.\gettwofromjobname}

\pagestyle{myheadings}

\setkomavar{nexthead}{Dr.~\usekomavar{fromname}, \getfourfromjobname.\getthreefromjobname.\gettwofromjobname \hfill\thepage/\pageref{LastPage}}
\setkomavar{nextfoot}{}


\setkomavar{firstfoot}{%
\hrule
E-Mail: \usekomavar{fromemail} \hfill \usekomavar*{frommobilephone}~\usekomavar{frommobilephone} \newline
\usekomavar*{IBAN}:~\usekomavar{IBAN}  \hfill \usekomavar*{BIC}:~\usekomavar{BIC}}

\begin{document}
\begin{letter}{Maria Mustermann \\ Musterweg 2 \\ 12345 Musterstadt}
\opening{Sehr geehrte Damen und Herren,}

\blindtext[5]

\closing{Mit freundlichen Grüßen}

\encl{Kopie }
\end{letter}
\end{document}

% \put(10,450){\qrcode[height=1cm]{\jobname-1}} |
%!TEX TS-program = XeLaTeX
% 2015-10-31
\documentclass[DIN,parskip=half,fontsize=11pt,fromalign=right,fromrule=afteraddress,ngerman,enlargefirstpage=true]{scrlttr2}
\usepackage{varsfromjobname}
\usepackage{qrcode}
\usepackage{blindtext}
\usepackage{eso-pic}
\usepackage{lastpage}
\usepackage{ifxetex}
\ifxetex
\usepackage{fontspec}%
\usepackage{polyglossia}%
\usepackage{navigator}
\setmainlanguage[spelling=new]{german}%
\setmainfont[ItalicFont={Source Sans Pro Italic},BoldFont={Source Sans Pro Bold},BoldItalicFont={Source Sans Pro Bold Italic}]{Source Sans Pro}%
\else
\usepackage{babel}
\usepackage{navigator}
\fi
\embeddedfile[TeX code]{\jobname}{\jobname.tex}
\renewcommand{\familydefault}{\sfdefault}
\firsthead{
\textsc{Dr.~\usekomavar{fromname} \hfill \thepage/\pageref{LastPage}}
\vspace*{1em}
\hrule
}
\setkomafont{pageheadfoot}{}
\newkomavar{fromplace}
\newkomavar{keywords}
\newkomavar{IBAN}
\newkomavar{BIC}
\setkomavar{IBAN}[IBAN]{DE12\,3456\,0123\,1234\,1234\,99}
\setkomavar{BIC}[BIC]{ABCDEFGHEI}
\setkomavar{yourref}{xyz-203052}
\setkomavar{yourmail}{\today}
\setkomavar{myref}[Mein Zeichen]{1929424487}
\setkomavar{fromname}{Max Mustermann}
\setkomavar{fromplace}{Hamburg}
\setkomavar{fromemail}{mustermann@gmail.com}
\setkomavar{frommobilephone}[Mobil:]{+49 (0) 123\,456\,7890}
\setkomavar{fromaddress}{Musterweg 19, 12345 Hamburg}
\setkomavar{subject}{Betreff}
\setkomavar{keywords}{Finanzamt}
\usepackage{hyperref}
\hypersetup{colorlinks,linkcolor={black},pdftitle={\usekomavar{subject}},pdfauthor={\usekomavar{fromname}}, %
pdfsubject={\usekomavar{subject}},pdfkeywords={\usekomavar{keywords}}
}
\date{\usekomavar{fromplace}, \getfourfromjobname.\getthreefromjobname.\gettwofromjobname}
\pagestyle{myheadings}
\setkomavar{nexthead}{Dr.~\usekomavar{fromname}, \getfourfromjobname.\getthreefromjobname.\gettwofromjobname \hfill\thepage/\pageref{LastPage}}
\setkomavar{nextfoot}{}
\setkomavar{firstfoot}{%
\hrule
E-Mail: \usekomavar{fromemail} \hfill \usekomavar*{frommobilephone}~\usekomavar{frommobilephone} \newline
\usekomavar*{IBAN}:~\usekomavar{IBAN} \hfill \usekomavar*{BIC}:~\usekomavar{BIC}}
\begin{document}
\begin{letter}{Maria Mustermann \\ Musterweg 2 \\ 12345 Musterstadt}
\opening{Sehr geehrte Damen und Herren,}
\blindtext[5]
\closing{Mit freundlichen Grüßen}
\encl{Kopie }
\end{letter}
\end{document}
% \put(10,450){\qrcode[height=1cm]{\jobname-1}}

Uwe Ziegenhagen likes LaTeX and Python, sometimes even combined.
Do you like my content and would like to thank me for it? Consider making a small donation to my local fablab, the Dingfabrik Köln. Details on how to donate can be found here Spenden für die Dingfabrik.
More Posts - Website
Category:
LaTeX,
Artikel |
Kommentare deaktiviert für Eine neue Briefvorlage mit scrlttr2
2015-08-30, 18:36
Ausgehend von http://uweziegenhagen.de/?p=1615 habe ich mal testweise auf scrlayer umgestellt, hier der resultierende Quellcode:
\documentclass[a4paper,11pt]{scrbook}
\usepackage[headsepline=0.5pt,footsepline=0.5pt]{scrlayer-scrpage}
\usepackage[left=2cm,right=4cm]{geometry}
\KOMAoptions{headwidth=1.1\textwidth,footwidth=1.1\textwidth}
\usepackage{blindtext}

\pagestyle{scrheadings}

\ohead{\headmark}
\ofoot[\pagemark]{\pagemark}

\ifoot{ifoot} % inner foot
\ihead{ihead} % inner head
\cfoot{cfoot} % center foot
\chead{chead} % center head

\begin{document}
\chapter{Hello}
\section{World}

\blindtext[10]

\end{document} |
\documentclass[a4paper,11pt]{scrbook}
\usepackage[headsepline=0.5pt,footsepline=0.5pt]{scrlayer-scrpage}
\usepackage[left=2cm,right=4cm]{geometry}
\KOMAoptions{headwidth=1.1\textwidth,footwidth=1.1\textwidth}
\usepackage{blindtext}
\pagestyle{scrheadings}
\ohead{\headmark}
\ofoot[\pagemark]{\pagemark}
\ifoot{ifoot} % inner foot
\ihead{ihead} % inner head
\cfoot{cfoot} % center foot
\chead{chead} % center head
\begin{document}
\chapter{Hello}
\section{World}
\blindtext[10]
\end{document}
Uwe Ziegenhagen likes LaTeX and Python, sometimes even combined.
Do you like my content and would like to thank me for it? Consider making a small donation to my local fablab, the Dingfabrik Köln. Details on how to donate can be found here Spenden für die Dingfabrik.
More Posts - Website
Schlagwörter:
KOMA,
scrlayer Category:
LaTeX,
Pakete |
Kommentare deaktiviert für Lebende Kolumnentitel mit scrlayer
2015-08-15, 15:29
Was ich an LaTeX so schätze, sind die Funktionen zum „Programmieren“ eigener Strukturen. Möchte ich einen Befehl zum Erfassen von Business Requirements erstellen, nutze ich einfach eine Kombination aus \newcounter, \the“counter“ und \addtocounter.
\documentclass[12pt,ngerman]{scrartcl}
\usepackage[utf8]{inputenc}
\usepackage[T1]{fontenc}
\usepackage{babel}

\newcounter{br}
\addtocounter{br}{1}
\newcommand{\br}[1]{BR--\thebr\stepcounter{br}: #1}

\begin{document}
 \br{Button einbauen}
 \br{Zweiten Button einbauen}
\end{document} |
\documentclass[12pt,ngerman]{scrartcl}
\usepackage[utf8]{inputenc}
\usepackage[T1]{fontenc}
\usepackage{babel}
\newcounter{br}
\addtocounter{br}{1}
\newcommand{\br}[1]{BR--\thebr\stepcounter{br}: #1}
\begin{document}
\br{Button einbauen}
\br{Zweiten Button einbauen}
\end{document}
In Word geht das auch, ist aber ein wenig komplizierter. Die folgende Beschreibung habe ich auf tips.net gefunden:
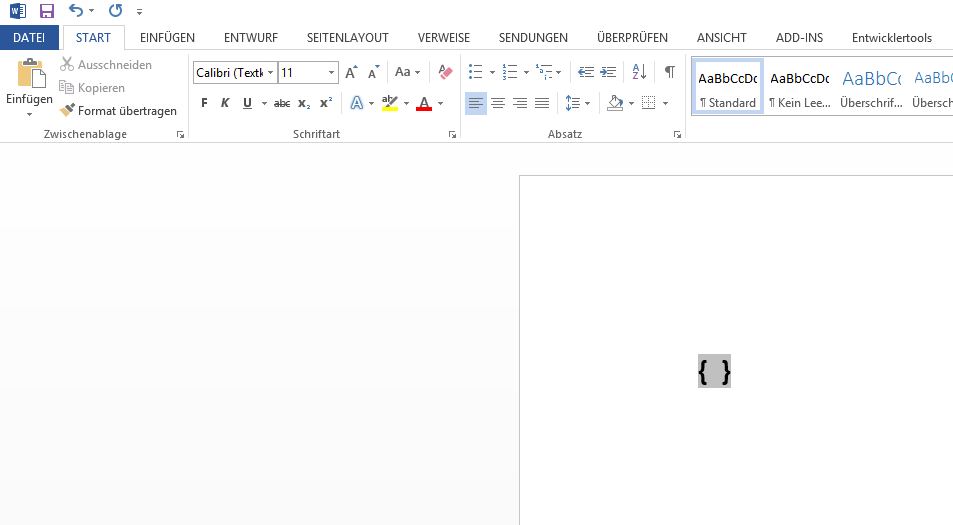
1. Schritt: Geh an die Stelle im Dokument, wo das Feld hin soll und drücke Strg-F9. Die erzeugt die Feldklammern.
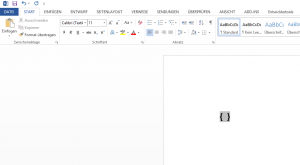
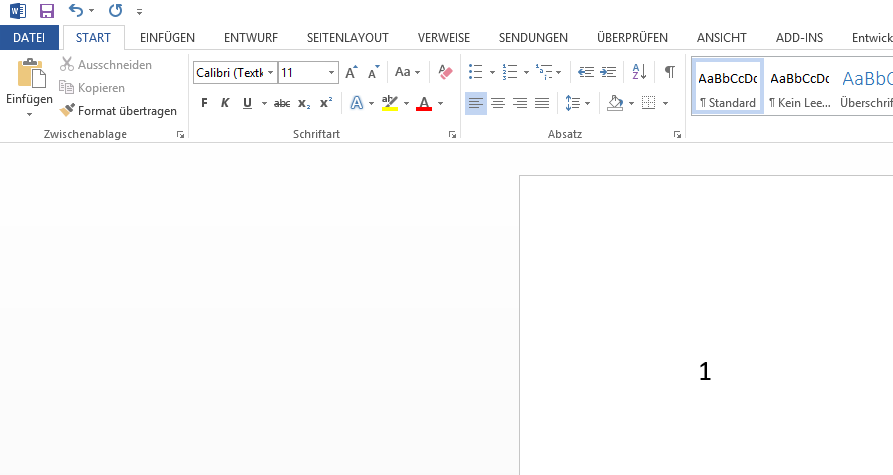
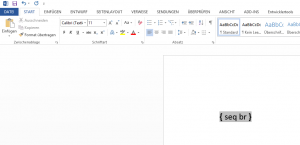
2. Schritt: Innerhalb der Feldklammern füge „seq br“ ein, „br“ steht dabei für den Namen des Zählers. Mit Alt-F9 kannst Du jetzt zwischen Code und Darstellung hin- und herwechseln.
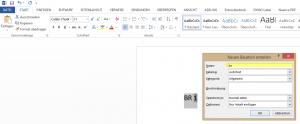
3. Schritt: Markiere den gesamten Code-Bereich, der später eingefügt werden soll und drücke Alt-F3. Dies öffnet das Menü für die Codebausteine. Gib einen kurzen prägnanten Titel („br“) ein und speichere den Baustein ab.
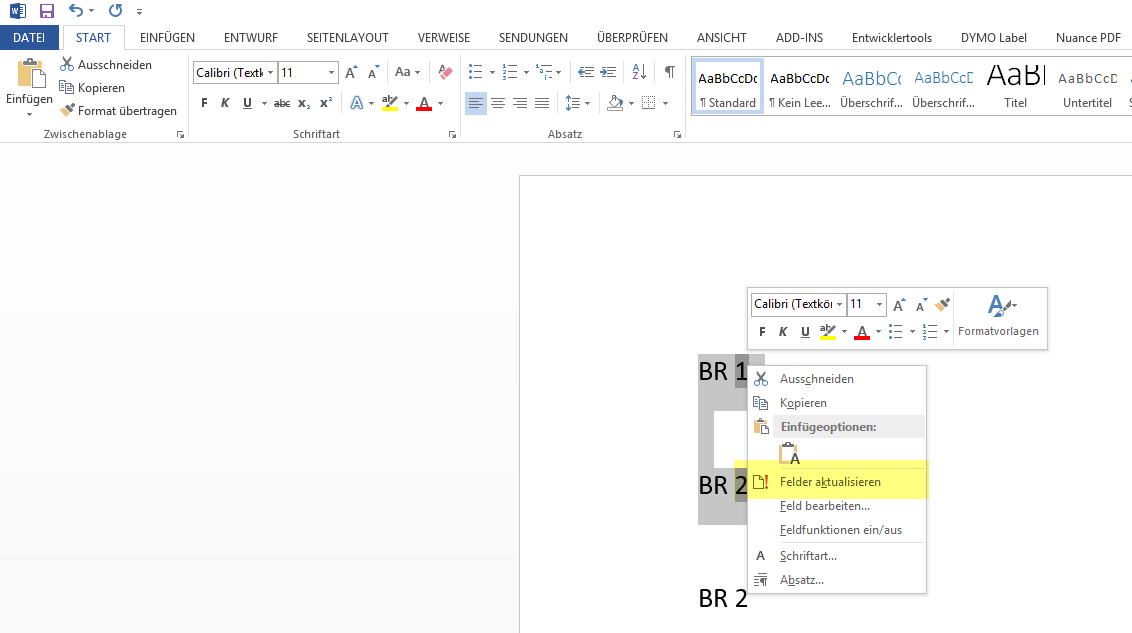
4. Schritt: Wenn Du jetzt irgendwo im Dokument den Zähler benutzen willst, drücke „br“ und der Baustein wird eingefügt.
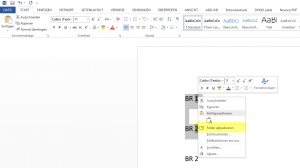
Solltest Du diese Bausteine auch mal zwischen bereits gesetzte Bausteine setzen, kann ein Refresh der Felder notwendig sein. Dann einfach Text markieren, rechte Maustaste und „Felder aktualisieren“.
Uwe Ziegenhagen likes LaTeX and Python, sometimes even combined.
Do you like my content and would like to thank me for it? Consider making a small donation to my local fablab, the Dingfabrik Köln. Details on how to donate can be found here Spenden für die Dingfabrik.
More Posts - Website