Author Archive

Setting up the cluster

This entry is part 3 of 5 in the series Raspberry Cluster

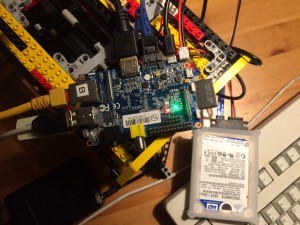
Since the case is pretty much complete now, it is time to take a look at the software. I finally decided to run Raspian on the PIs and Lubuntu on the Banana Pi. While there may be other (maybe even more suitable) OSes available I think is the best starting point for my project. The Banana Pi is equipped with Lubuntu.

After booting the Banana Pi I switched to the German keyboard layout (unfortunately the corresponding GUI is horrible). Afterwards the usual apt-get update and apt-get upgrade took care of software updates.

The next steps are the configuration of a static IP as well as the installation of the SSH demon and samba.

Banana Pi updating

EDIT

I just learnt about Bananian which is based on Debian 7. It does not provide a desktop environment, so a 2 GB SD card is said to be sufficient. Since I just want the Bananapi to act as samba server all the Lubuntu features are pretty irrelevant for me.

It also has a sshd running

Uwe

Uwe Ziegenhagen likes LaTeX and Python, sometimes even combined. Do you like my content and would like to thank me for it? Consider making a small donation to my local fablab, the Dingfabrik Köln. Details on how to donate can be found here Spenden für die Dingfabrik.

More Posts - Website
Creating Dymo Labels with LaTeX

Today I purchased a Dymo 450 label printer. Of course I want to be able to print my labels from LaTeX, so I quickly created a test document.

Important: the correct label size must be set in the printer dialogue.

% For the 11354 label
\documentclass[14pt,ngerman]{scrartcl}
\usepackage[left=7.5mm,right=2mm,top=5mm,bottom=5mm,% 
paperwidth=57mm, paperheight=32mm]{geometry}
\usepackage[utf8]{inputenc}
\usepackage[T1]{fontenc}
\usepackage{babel}
\usepackage{palatino}
 
\setlength{\parindent}{0pt}
\setlength{\parskip}{0pt}
 
\begin{document}
 
Max Mustermann \\ Musterweg 1 \\ 12345~Musterstadt
 
\end{document}

label1

Uwe

Uwe Ziegenhagen likes LaTeX and Python, sometimes even combined. Do you like my content and would like to thank me for it? Consider making a small donation to my local fablab, the Dingfabrik Köln. Details on how to donate can be found here Spenden für die Dingfabrik.

More Posts - Website

Building a case for the Raspberry 2 cluster

This entry is part 2 of 5 in the series Raspberry Cluster

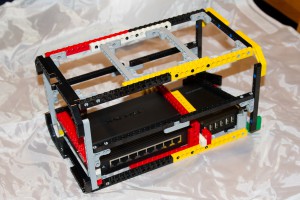
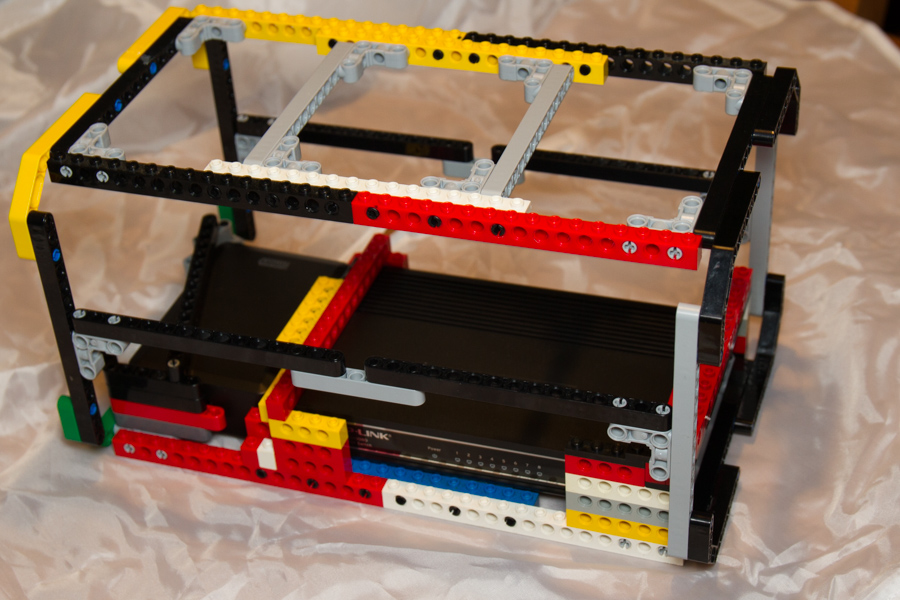
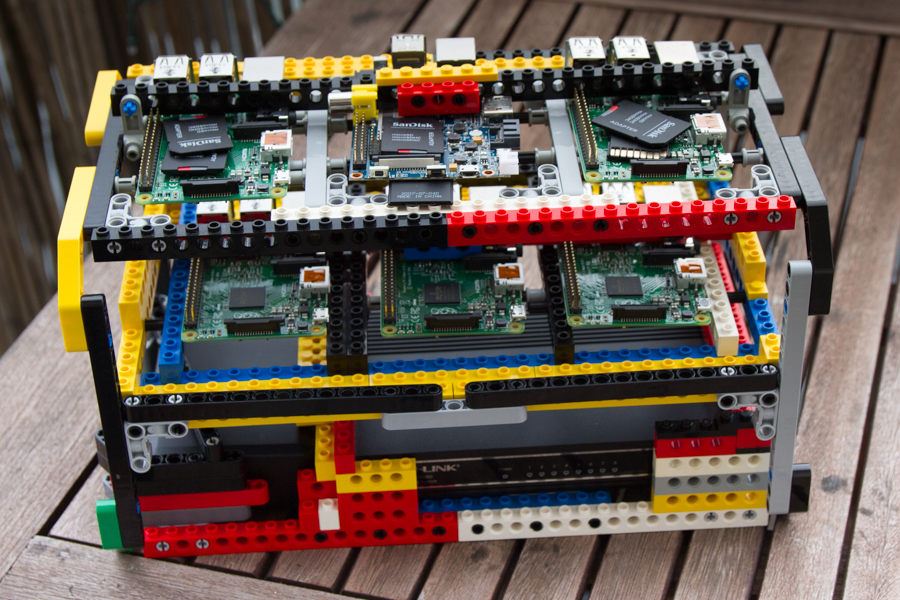
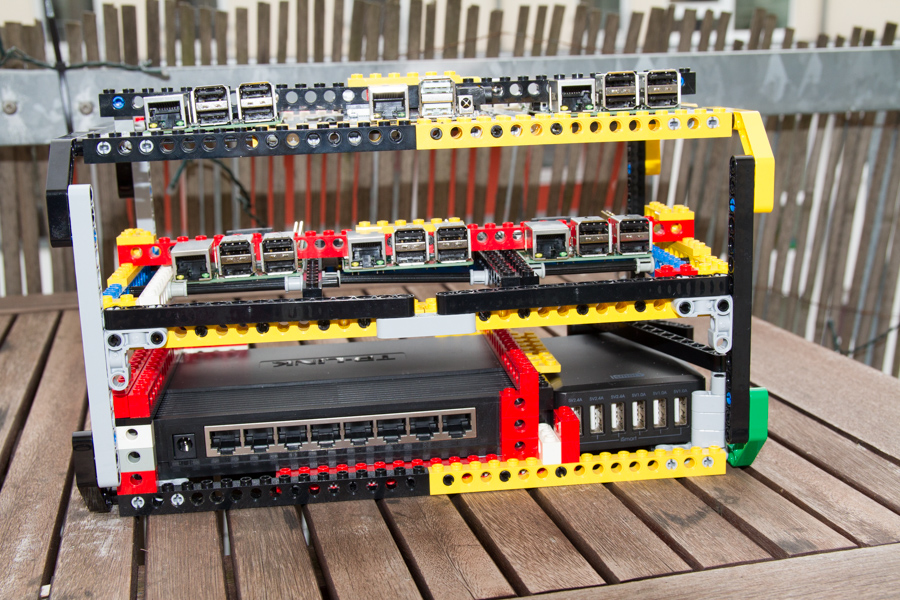
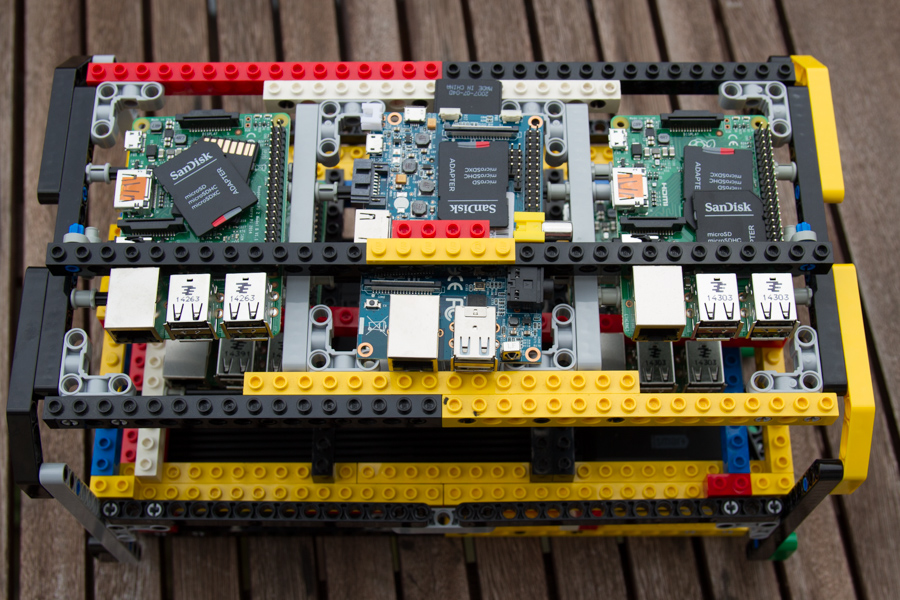
Just putting 6 microcontrollers on the table won’t work long (low WAF) so I decided to use the vast amount of my Lego Technic components to build a suitable case. In the future I might switch to a custom-made Acryl case (I could use the Dingfabrik’s laser cutter) but for quick prototyping nothing beats LEGO. For this project I had to buy a few extra components, among them two dozen LEGO 55615 which drove the costs a little.

IMG_7950

IMG_7953

IMG_7963

IMG_7973

IMG_7980

IMG_7983

Uwe

Uwe Ziegenhagen likes LaTeX and Python, sometimes even combined. Do you like my content and would like to thank me for it? Consider making a small donation to my local fablab, the Dingfabrik Köln. Details on how to donate can be found here Spenden für die Dingfabrik.

More Posts - Website
Building a Raspberry Pi 2cluster

This entry is part 1 of 5 in the series Raspberry Cluster

Big Data, Hadoop, NumPy, R cluster computing etc. are pretty hot topics. To get my hands on them and get a deeper understanding I have decided to build my own cluster out of small Raspberry Pi 2 computers. I am not the first one to come up with this idea, you can find a few nice examples online.

I have decided to use five Raspberry Pi 2 and one Banana Pi in this cluster. The Banana Pi has the advantage of being equipped with a Serial ATA port, my plan is to use it to store the data the Raspberries are working on.

The general setup is the following:

  1. 5 x Raspberry Pi 2 from Pollin for 37.95 Euro each
  2. A TP-Link 8-Port Gigabit Switch for 20.99 Euro
  3. a 6-Port RAVpower USB power source (3 x 1.0 Amp, 3 x 2.4 Amp) for 17.99 Euro
  4. a couple of five micro USB cables for 12.99 Euro
  5. Identical 16 GB micro-SD cards from Sandisk, Class 10 for 10.99 each
  6. the Banana Pi (I got mine from notebooksbilliger.de for 33.89 Euro)
  7. a SATA Power/Data cable to connect a 2.5″ harddisk to the Banana Pi

So altogether I spent around 320 for the electronic parts, some other parts (like SD card and USB cable for the Banana Pi) I had in my stash.

In the next article of this series I’ll describe the case I am currently building out of Lego Technics parts…

Uwe

Uwe Ziegenhagen likes LaTeX and Python, sometimes even combined. Do you like my content and would like to thank me for it? Consider making a small donation to my local fablab, the Dingfabrik Köln. Details on how to donate can be found here Spenden für die Dingfabrik.

More Posts - Website
Excel Funktion zum Zerlegen eines Strings

Die folgende Excel-Funktion ist nützlich, um innerhalb von Excel Strings in ihre Bestandteile zu zerlegen.


Function SplitteString(zeichenkette, separator, vorkommen) As String
Dim feld() As String
feld = Split(zeichenkette, separator)
SplitteString = feld(vorkommen - 1)
End Function

split

Uwe

Uwe Ziegenhagen likes LaTeX and Python, sometimes even combined. Do you like my content and would like to thank me for it? Consider making a small donation to my local fablab, the Dingfabrik Köln. Details on how to donate can be found here Spenden für die Dingfabrik.

More Posts - Website
„LaTeX Beginner’s Guide“ for free

Stefann Kottwitz, the autor, told me today that his „LaTeX Beginner’s Guide“ would be available for free today. More information is available from
LaTeX-Community.org or Packt

LaTeX Beginner's Guide

Uwe

Uwe Ziegenhagen likes LaTeX and Python, sometimes even combined. Do you like my content and would like to thank me for it? Consider making a small donation to my local fablab, the Dingfabrik Köln. Details on how to donate can be found here Spenden für die Dingfabrik.

More Posts - Website
Buchkritik: „JavaScript & jQuery: The Missing Manual“ von David Sawyer McFarland

Wie einige Leser meines Blogs möglicherweise wissen, unterrichte ich auch an der FOM hier in Köln. Für die Vorlesung zu „Web Programmierung“ hatte ich noch ein Buch gesucht, das die Grundlagen zu JavaScript/jQuery gut vermittelt. Über einen Kontakt der Kölner Python-Usergroup (vielen Dank auch dorthin) habe ich dann vom O’Reilly Verlag freundlicherweise ein Rezensionsexemplar der mittlerweile dritten Ausgabe von „JavaScript & jQuery: The Missing Manual“ erhalten, die ich hier kurz besprechen möchte.

Das Buch gliedert sich in sechs Teile:

  1. Getting Started with JavaScript
  2. Getting Started with jQuery
  3. Getting Started with jQuery UI
  4. Advanced jQuery and JavaScript
  5. Tips, Tricks, and Troubleshooting
  6. Appendix

Das Buch geht (zu Recht) davon aus, dass man grundlegende HTML-Kenntnisse hat. Am Anfang wird zwar kurz über HTML-Tags gesprochen — auch CSS wird kurz erwähnt — dann geht es aber los mit der JavaScript Programmierung. Nach dem obligatorischen „Hello World“ bekommt man die grammatikalischen Grundlagen der Sprache nähergebracht und welche Datentypen und Schlüsselwörter es gibt. Sehr ausführlich ist auch die Beschreibung von Flusssteuerung und Schleifen.

Im zweiten Teil startet man dann mit jQuery. Im direkten Vergleich mit JavaScript merkt man als Leser schnell, dass die Nutzung von jQuery doch einige Vorteile hat. Was in reinem JavaScript mühsame Konstrukte erfordert, ist in jQuery meist in einer kurzen Zeile erledigt. Der Autor zeigt hier auch sehr ausführlich, wie man Elemente in jQuery selektieren und auswerten kann. In Kapitel 5 geht es dann um die Behandlung von Events, in Kapitel 6 um die Steuerung von Animationen mittels jQuery.

Kapitel 7 vermittelt, wie häufig vorkommende Aufgaben wie das Austauschen von Bildern in jQuery schnell & einfach gelöst werden können, Kapitel 8 geht auf die Nutzung von jQuery in Web-Formularen ein.

Der dritte Teil ab Kapitel 9 behandelt jQuery UI, ein Thema, das ich aus Zeitmangel in der Vorlesung nur am Rande behandeln konnte. Der Autor zeigt hier, wie man die verschiedenen Komponenten aus dem jQuery UI Paket nutzt und wie man das gewonnene Wissen nutzen kann, um eine TODO-Listen Anwendung zu schreiben.

Fazit

Auf über 650 Seiten und bei einem aktuellen Preis von etwas mehr als 30 Euro bietet dieses Buch einen sehr guten und umfassenden Einstieg in das Thema. Ich konnte eine ganze Reihe von Inhalten — auch in Bezug auf die Vermittlung des Wissens — direkt in der Vorlesung einsetzen. Ich empfehle dieses Buch auch meinen Studenten, wenn sie mehr wissen wollen zu JavaScript & jQuery.

Uwe

Uwe Ziegenhagen likes LaTeX and Python, sometimes even combined. Do you like my content and would like to thank me for it? Consider making a small donation to my local fablab, the Dingfabrik Köln. Details on how to donate can be found here Spenden für die Dingfabrik.

More Posts - Website
The new scrletter package in KOMA-Script

Since version 3.15 of the KOMA-Script bundle there is a new scrletter package, providing the scrletter functionality in other document classes. Here’s an example of what can be done with the package:

\documentclass[12pt,ngerman]{scrartcl}
\usepackage[utf8]{inputenc}
\usepackage[T1]{fontenc}
\usepackage{booktabs}
\usepackage{babel}
\usepackage{graphicx}
\usepackage{csquotes}
\usepackage{paralist}
\usepackage{xcolor,blindtext}
 
\usepackage{scrletter}
 
\begin{document}
 
\blindtext[3]
 
\setkomavar{fromname}{Max Mustermann}
\setkomavar{fromaddress}{Musterstr. 12 \\ 12345~Musterstadt}
\setkomavar{place}{Musterstadt}
\setkomavar{subject}{Mahnung}
 
\begin{letter}{Martina Musterfrau \\ Musterweg 4 \\ 12346~Musterdorf}
\opening{Sehr geehrte Damen und Herren,}
 
\closing{Mit freundlichen Grüßen,}
\end{letter}
 
\end{document}

In generates a standard article on the first page while putting the letter on the second page. Pretty cool, right?

sc1

sc2

Uwe

Uwe Ziegenhagen likes LaTeX and Python, sometimes even combined. Do you like my content and would like to thank me for it? Consider making a small donation to my local fablab, the Dingfabrik Köln. Details on how to donate can be found here Spenden für die Dingfabrik.

More Posts - Website

Using Document Properties in Microsoft Word 2007

What I really like about LaTeX is the way one can easily define own commands that get expanded in the text whenever needed. Word has a similar feature, called document variables. Unfortunately these can only be set by VBA macros, there is (according to my knowledge) to way to manage them via GUI. Fortunately Word has another feature which provides a more or less similar functionality with the name „Document properties“.

Here’s a brief tutorial how to define and use a new variable:

1) Open the properties of the document

01

2) Open the extended properties

02

3) Create a new variable, here I used „Projekt“ with the value „MeinProjekt“

03

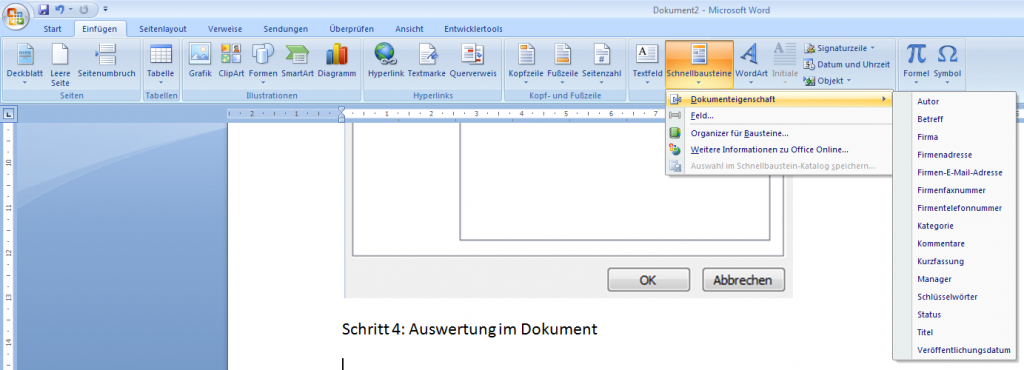
4) To use this new variable simply insert a new field:

04

05

5) and select the corresponding variable

06

6) The internal syntax is the following (when you press Alt-F9 you get this „internal“ view)

07

Uwe

Uwe Ziegenhagen likes LaTeX and Python, sometimes even combined. Do you like my content and would like to thank me for it? Consider making a small donation to my local fablab, the Dingfabrik Köln. Details on how to donate can be found here Spenden für die Dingfabrik.

More Posts - Website

Looping with LaTeX — Generating Name Cards

Today I had to generate a few name cards, LaTeX and the pgffor command came very handy doing that. I am not entirely satisfied with this solution, since the margins are hardwired, so if you have a better way just tell me.

\documentclass[45pt,ngerman]{scrartcl}
\usepackage[left=1cm,right=1cm,top=1.5cm,bottom=0.5cm,a4paper]{geometry}
\usepackage[utf8]{inputenc}
\usepackage[T1]{fontenc}
\usepackage{babel}
\usepackage{pgffor}
\usepackage{tikz}
\usepackage{xcolor}
\usepackage{lmodern}
\usetikzlibrary{positioning}
\pagestyle{empty}
\setlength{\parskip}{0pt}
\begin{document}
\centering

\foreach \x in {Manfred Mustermann, Gabi Mustermann, Manuela Mustermann}{
\begin{tikzpicture}
[mybox/.style={rectangle,black,xshift=0cm,yshift=0cm,minimum width=0.975\textwidth,font=\bfseries,draw=black,very thick,align=center, minimum height=0.475\textheight}]
\node at (0,0) [mybox] {\x};
\node at (0,0.475\textheight) [mybox] {};
\end{tikzpicture}\clearpage}

\end{document}

dann

Uwe

Uwe Ziegenhagen likes LaTeX and Python, sometimes even combined. Do you like my content and would like to thank me for it? Consider making a small donation to my local fablab, the Dingfabrik Köln. Details on how to donate can be found here Spenden für die Dingfabrik.

More Posts - Website